

Wardrobe with reclaimed doors, part 1

Over the last few posts you have been seeing snippets of my bedroom makeover. My bed has a new rustic look due to some wood effect planks, the alcoves are decorated with wall stickers and a cheap rug had an Anthropologie style transformation with some handmade tassels. Today I will show you part 1 of the biggest build in the room, my wardrobe.
As the bedroom is in the attic and has slanted ceiling my old wardrobes unfortunately didn't fit. Buying new ones wasn't an option either due to the restricted head space so building my own it was! I thought it might be nice if one whole wall will be transformed into a wardrobe, it looks like a build in but in fact I can take it apart in case I want to take it with me in our next move. To make the build a bit easier I used Ikea Ivar units as the base of the wardrobe. I love the Ivar range (do you remember my hack turning one of the units into a bear faced bookcase?) and used the 50x226 units for my build. The stands are made out of pine wood and super easy to cut to make them fit the slanted ceiling, have a look at the video to see how I started the wardrobe build.
Building the frame wasn't to tricky right? Just make sure you anchor the frame to the walls so you have a sturdy base, you don't want your wardrobe to toppel over. In next weeks video I will show you how you hang the doors and finish the frame so please tune in again next Thursday!
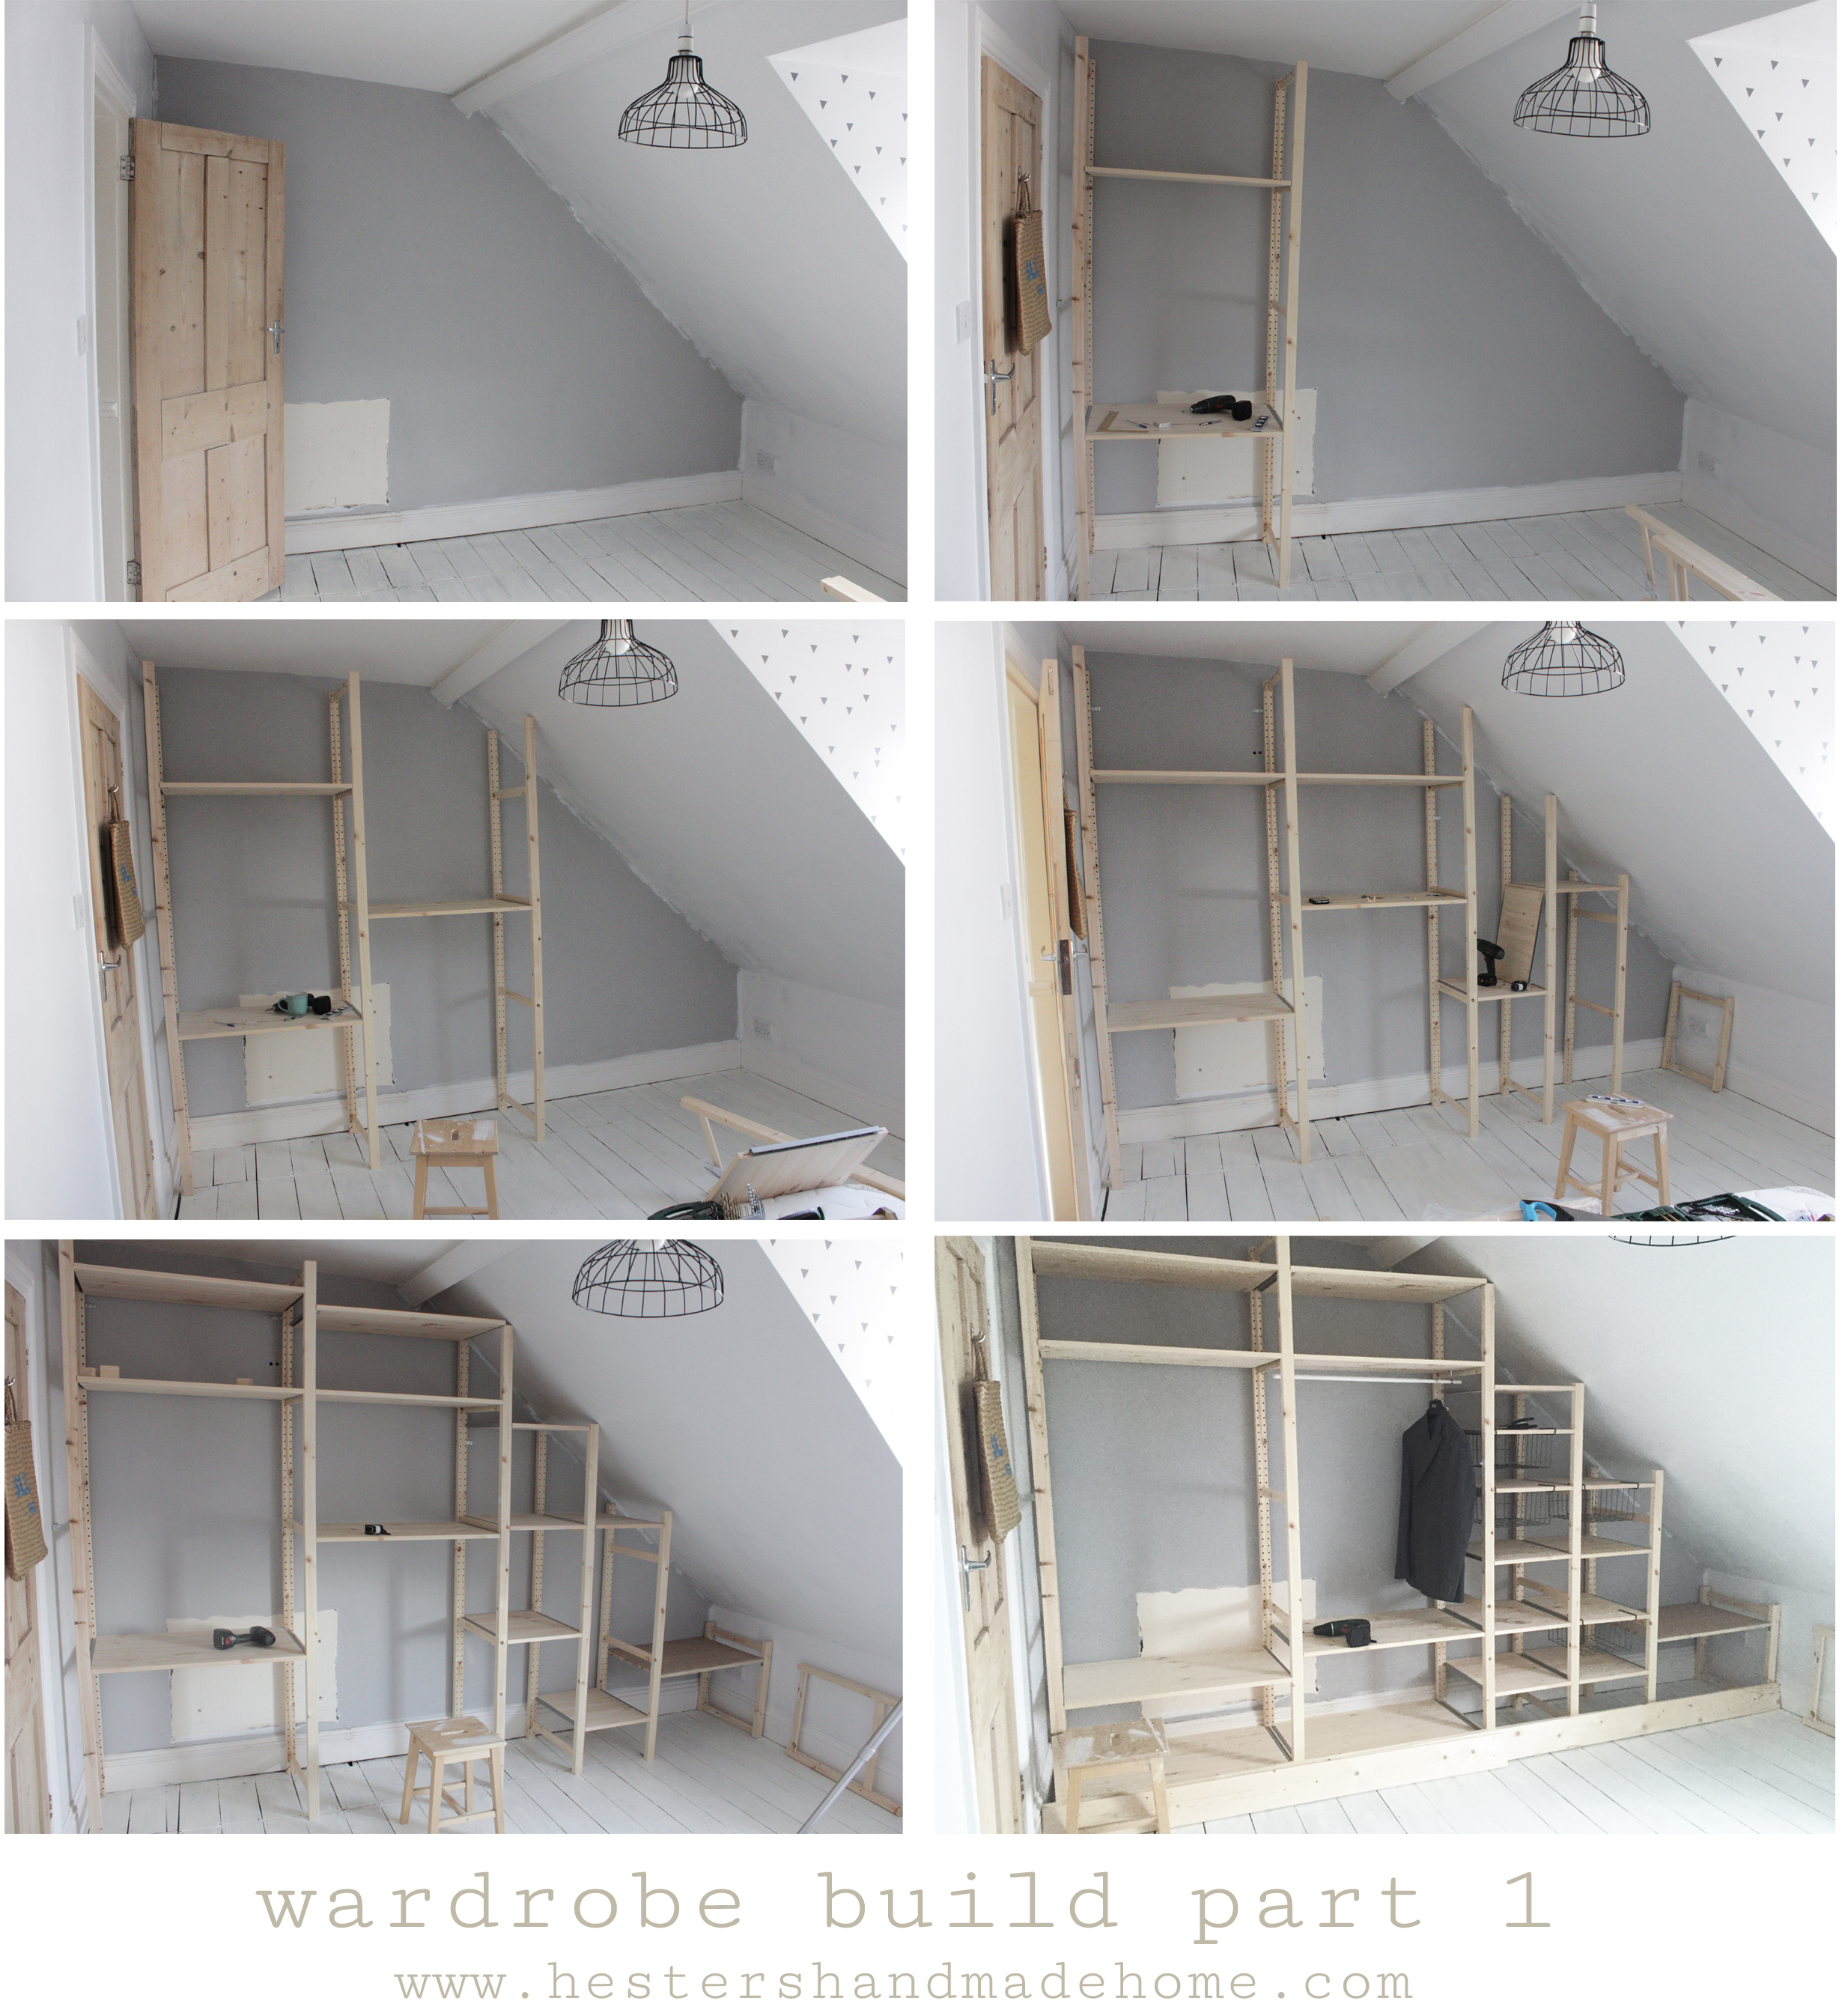
For the frame I used planks of 83cm wide for the big units that will hold our hanging clothes and planks of 42cm wide for the shelves that will have the folded clothes on. The last plank completely on the right is made out of a piece of leftover ply hold up on corner squares, unfortunately the last cupboard space was just under 80cm so the Ikea plank didn't fit. If you want to build a similar wardrobe measure the width of the room and see how many units of 42 and 83 cm you can fit in, don't forget to also put the width of the stands into your calculations. The stands are cut to size so they just fit under the slanted roof.

Please tune in next week to see me finish the wardrobe! xx Hester
Photo's and video by Hester van Overbeek, please don't use without permission, the wardrobe build with reclaimed doors first appeared here on Hester's Handmade Home.


Follow me on Instagram at @byhestergrams