


How to paint a wall organiser
In a bid to stay organised I love making a good to do list. I am forever scribbling things down on pieces of paper that I can’t find anymore when I need them, I needed a good notice board. I could of course have gone to the store and buy a white or chalk board but I wanted something a bit more interesting. Something that fits in with my interior but also gives an injection of fun and then I though Annie Sloan Wall paint! I previously used Annie’s wall paint to paint my living room and I love how easy this paint is to apply with its big bristle brush. It’s also very durable and easy to clean. Have a look at the video below to see how I got on
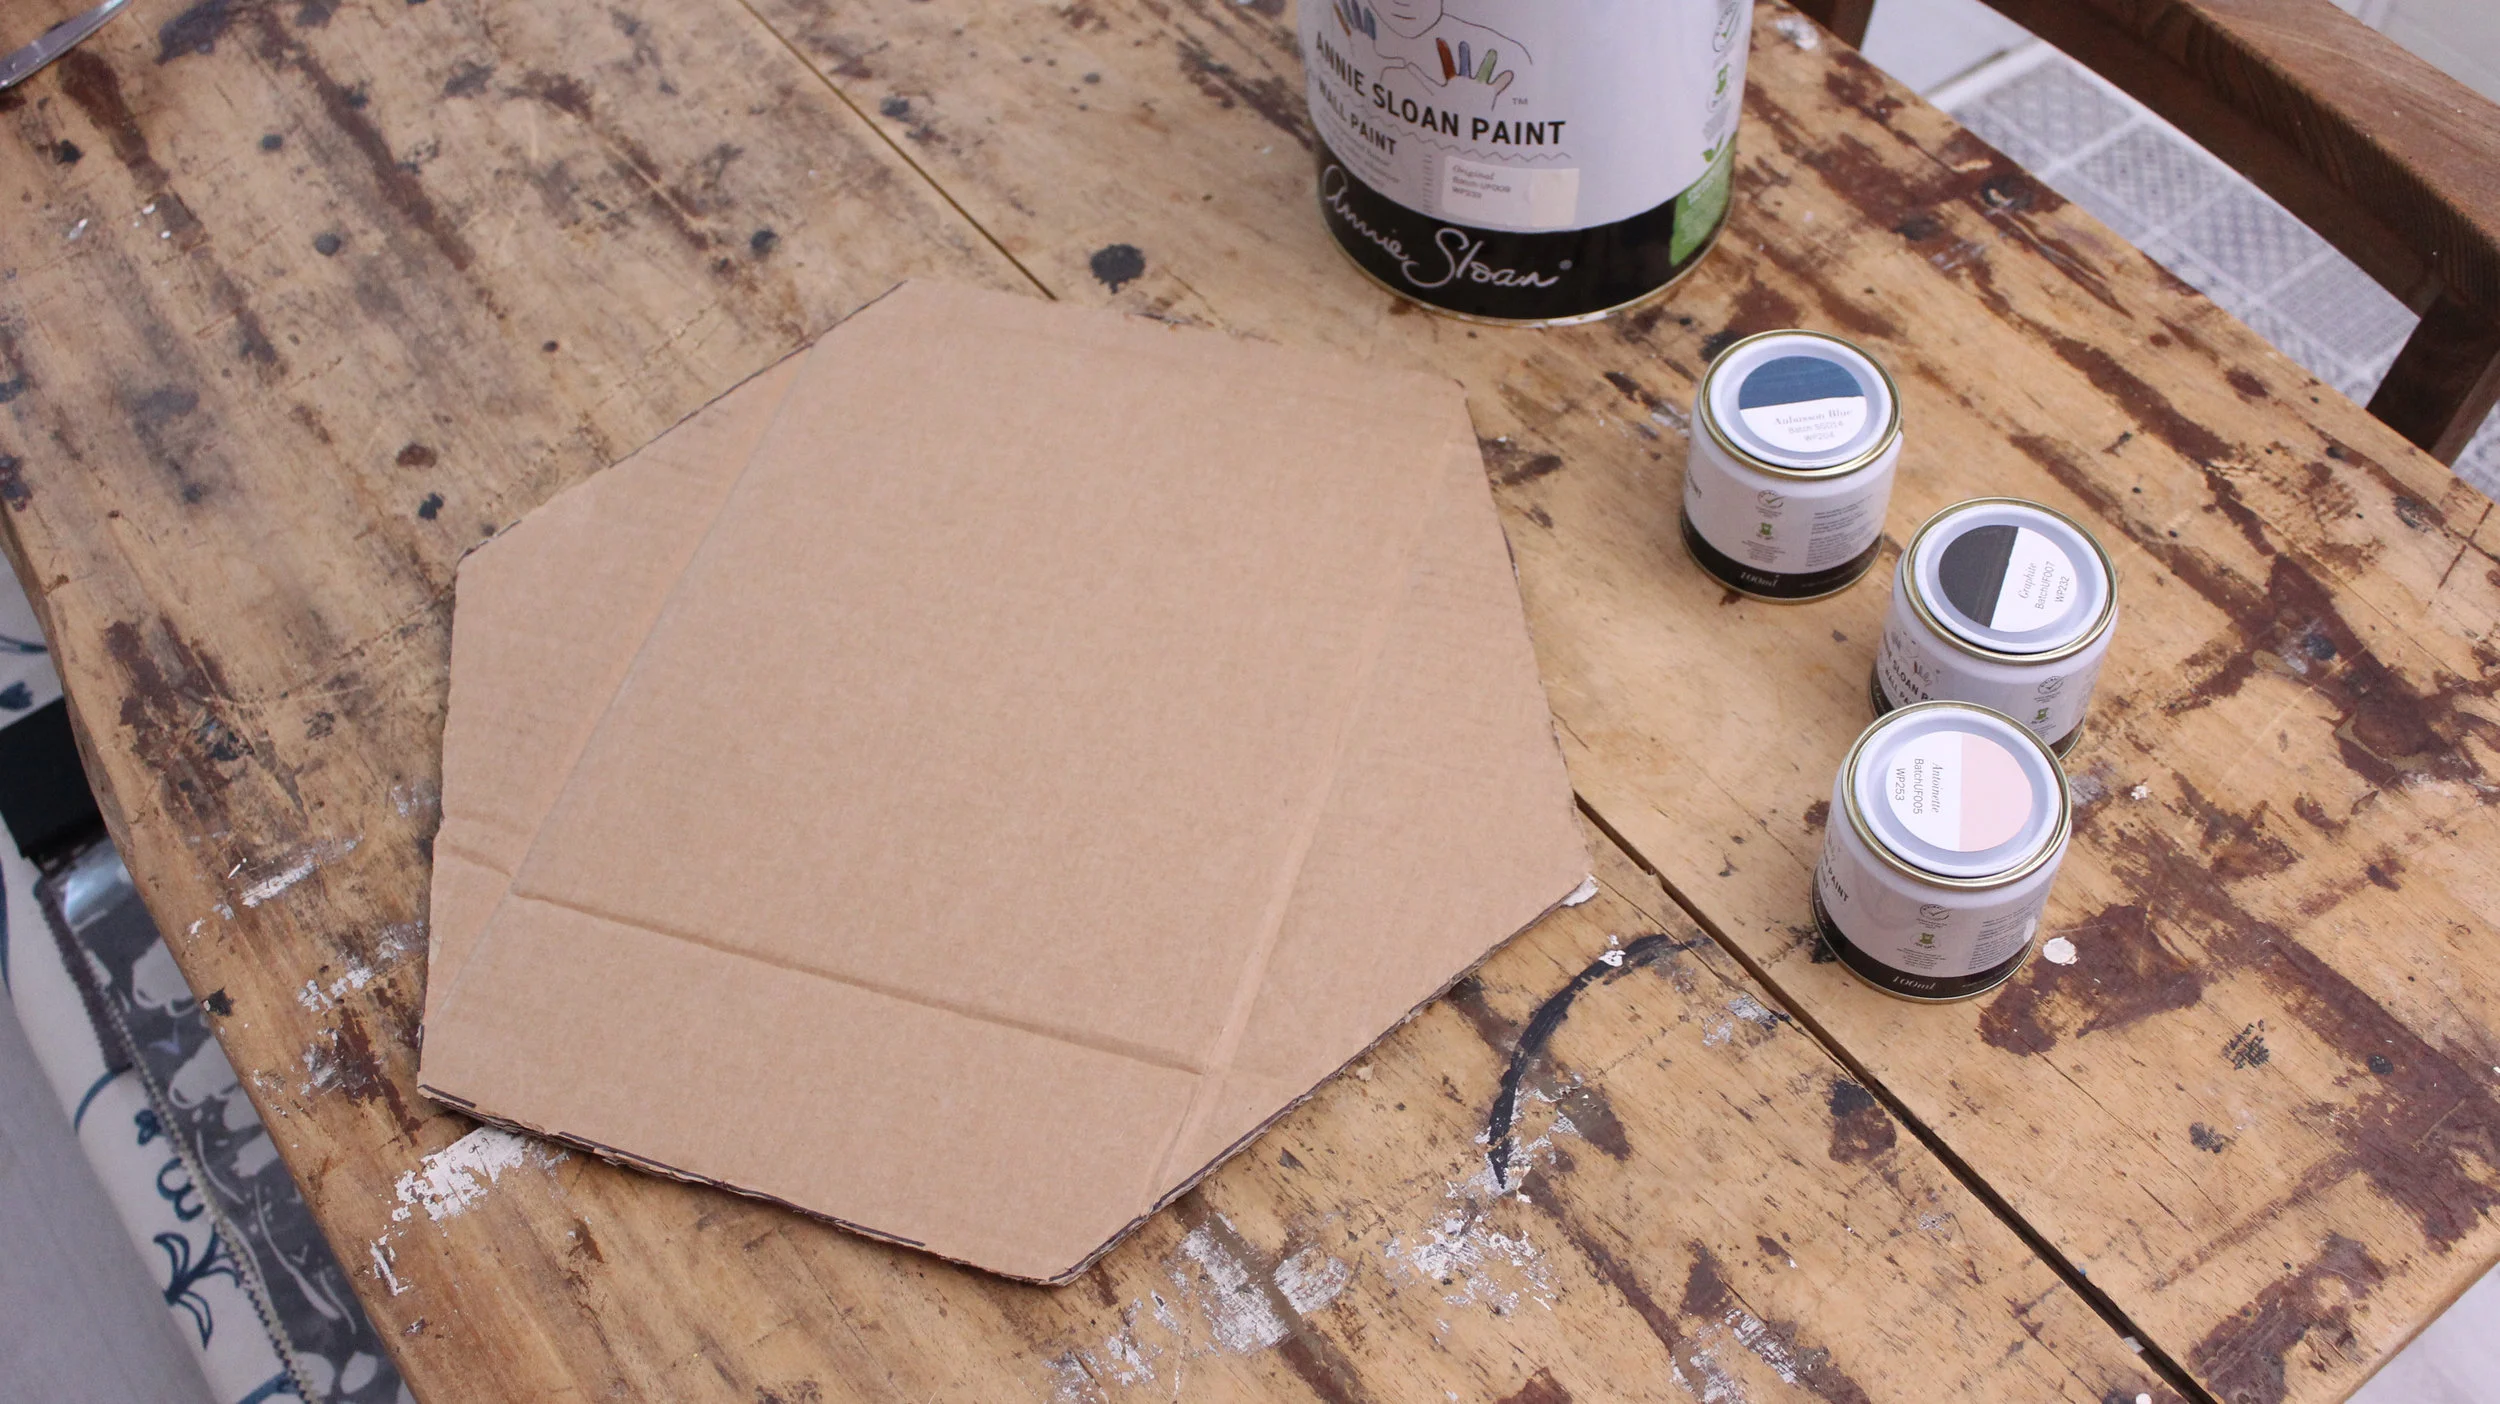
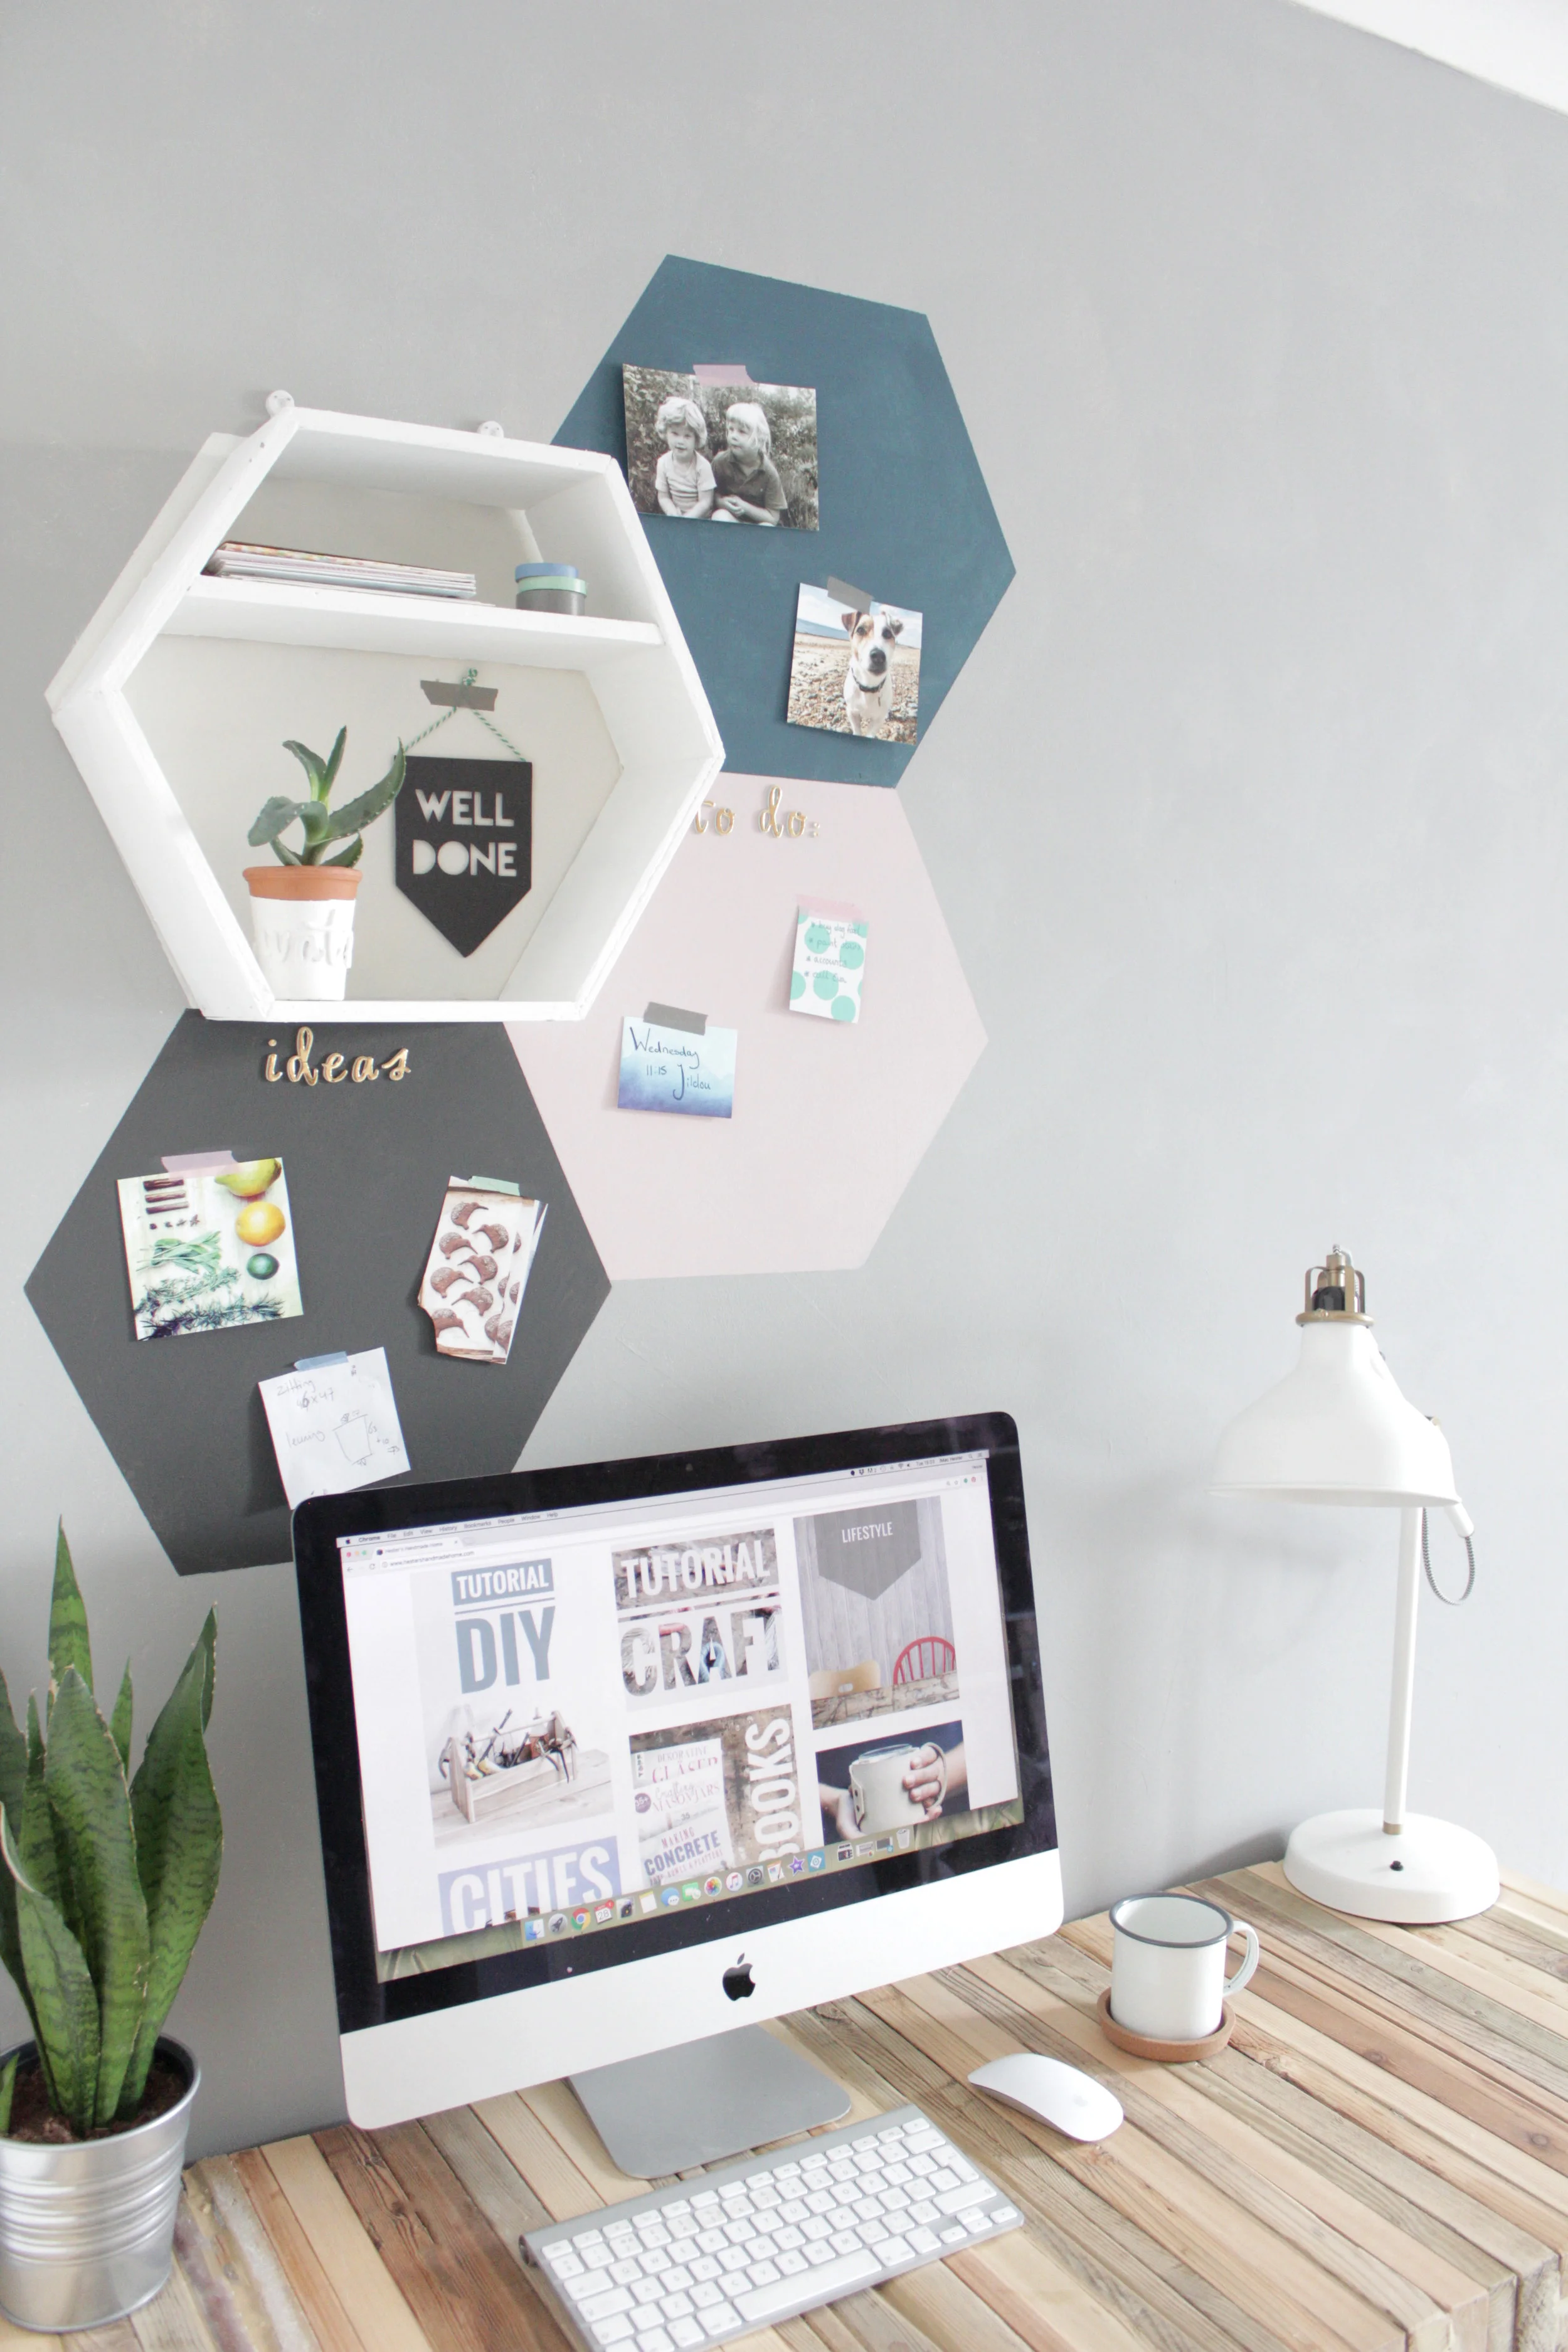
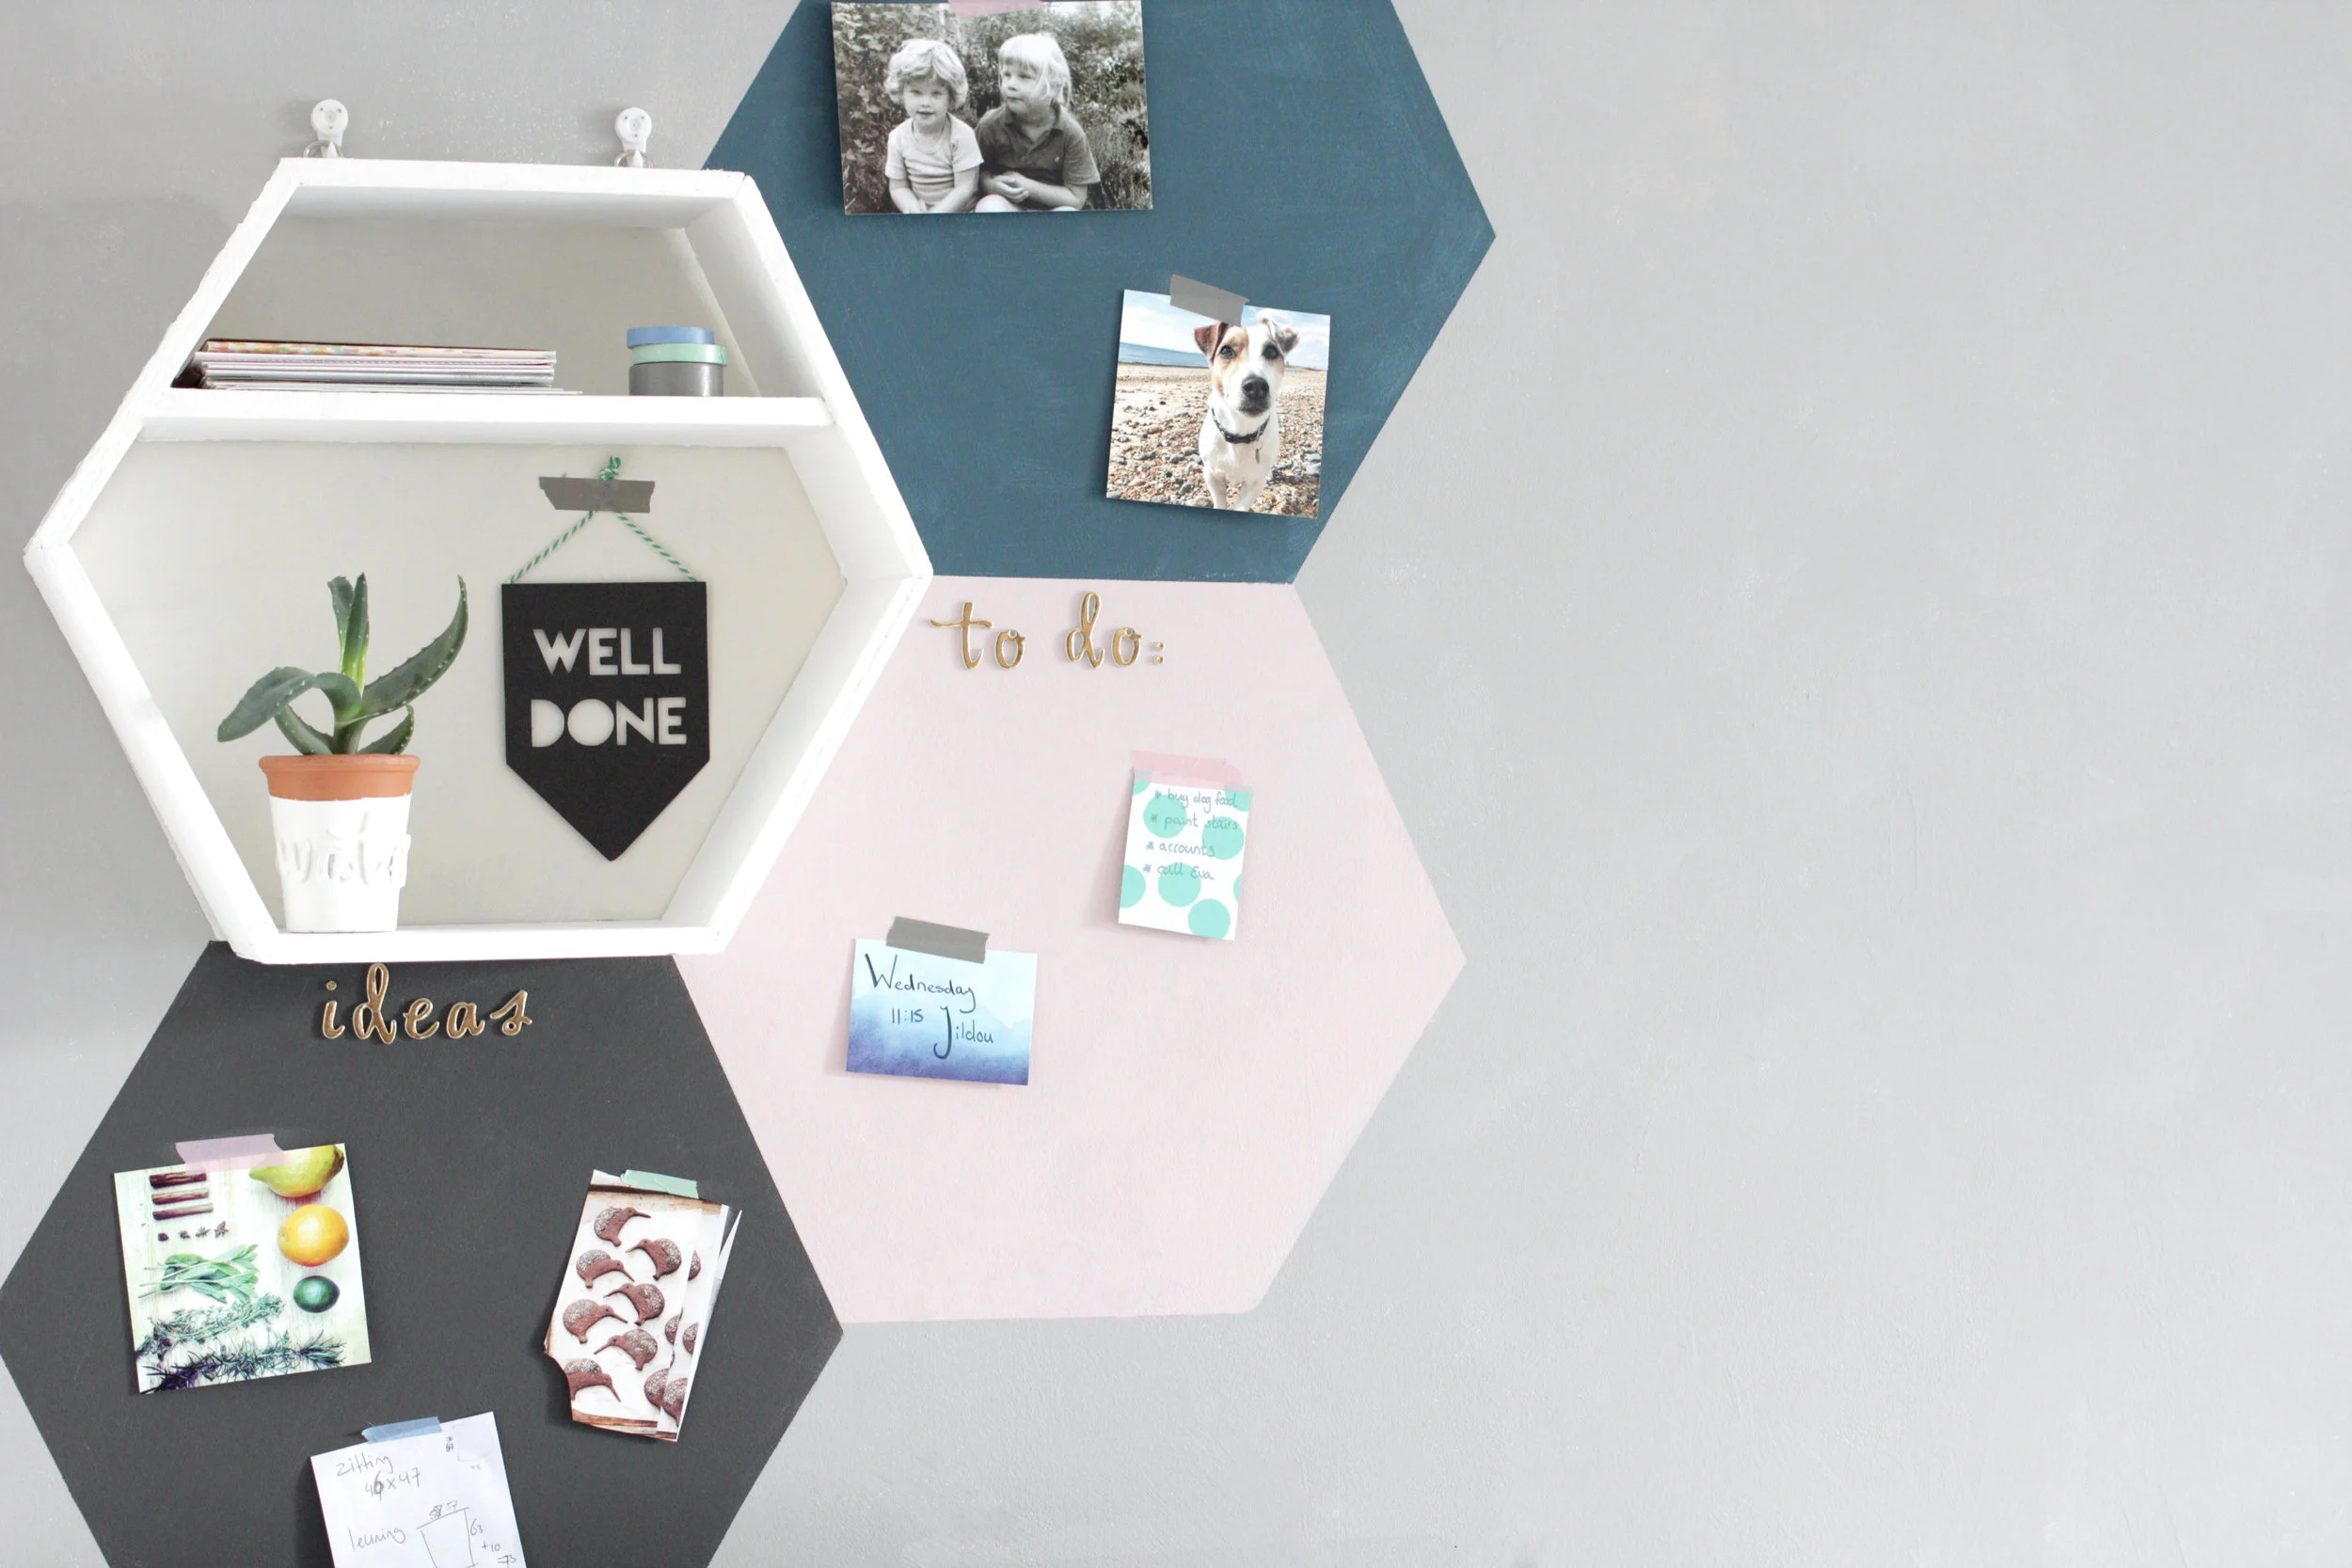
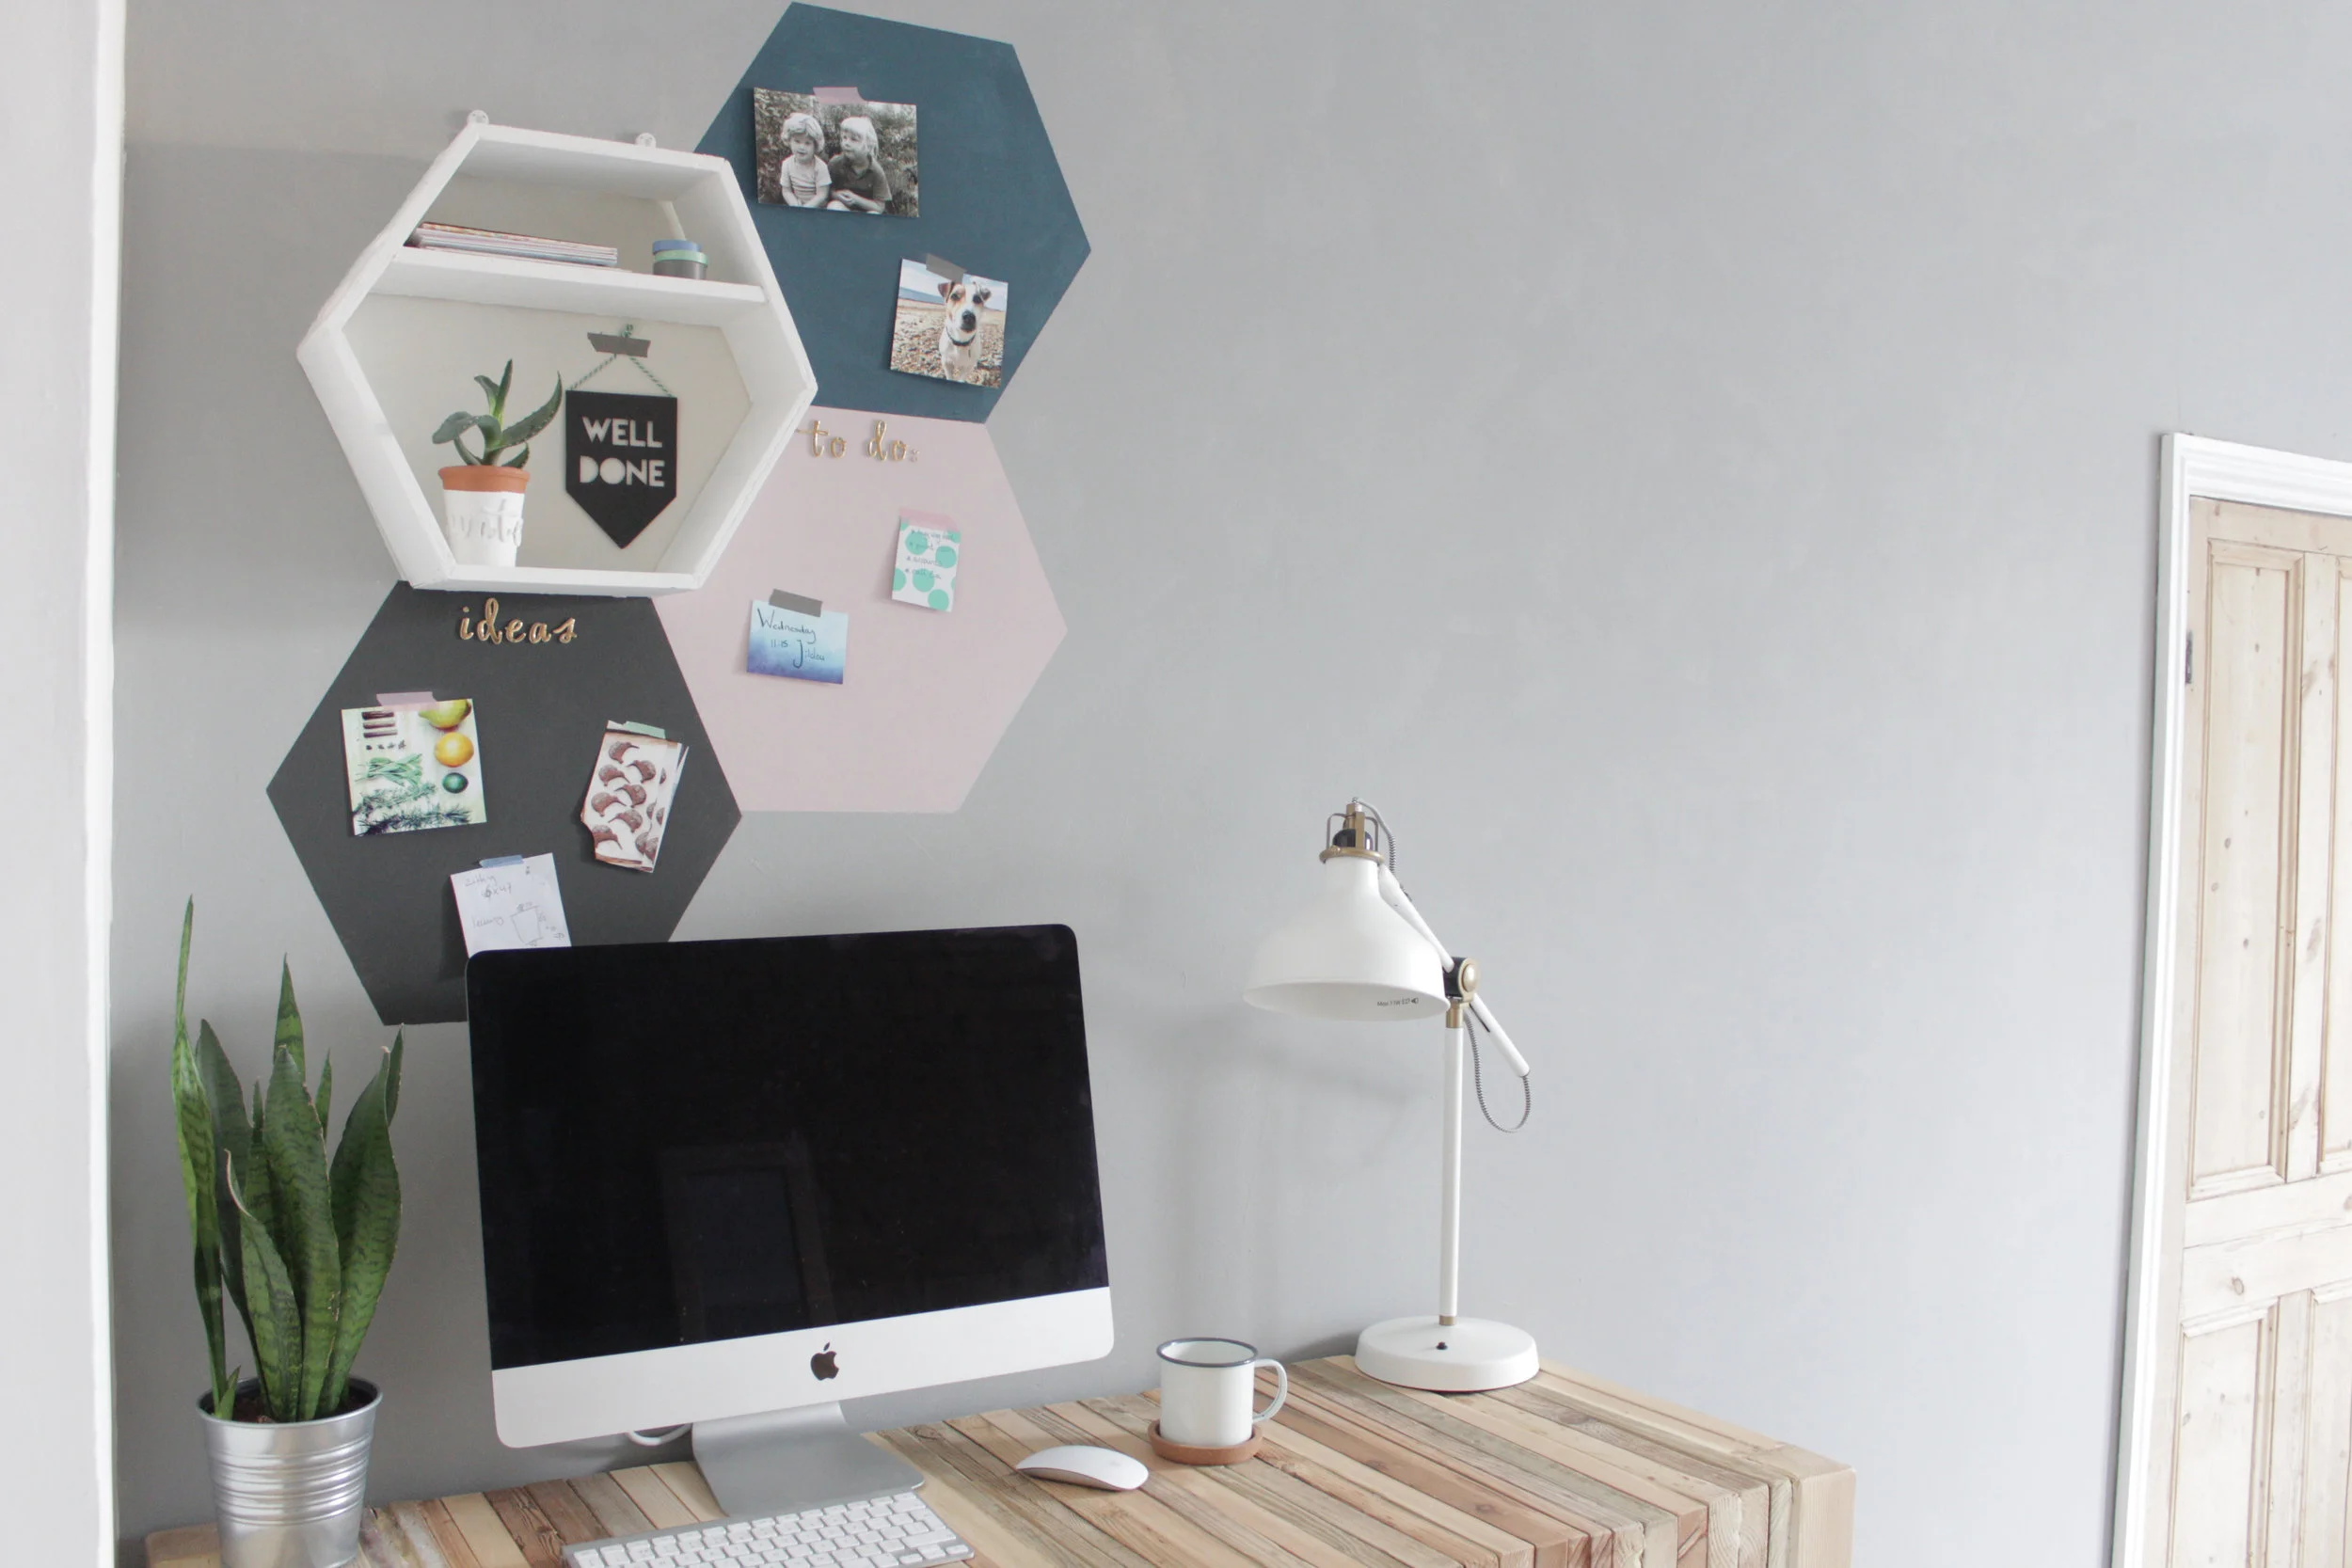
I prepped my wall for its hexagon noticeboard by painting it in Paris Grey a lovely warm grey tone. To make sure the hexagons were all the same size I made a template out of an old piece of cardboard, the sides are all 20 cm long. I placed the template on the wall and traced around it with a pencil. I traced it four time but you can make as many hexagons as you like (or need) One by one paint the hexagons, use masking tape around the shapes to make sure you have nice neat edges. Paint one, let it dry, tape the next one, paint etc. I used Annie Sloan Wall paint in Antoinette, Graphite, Original and Aubusson blue.
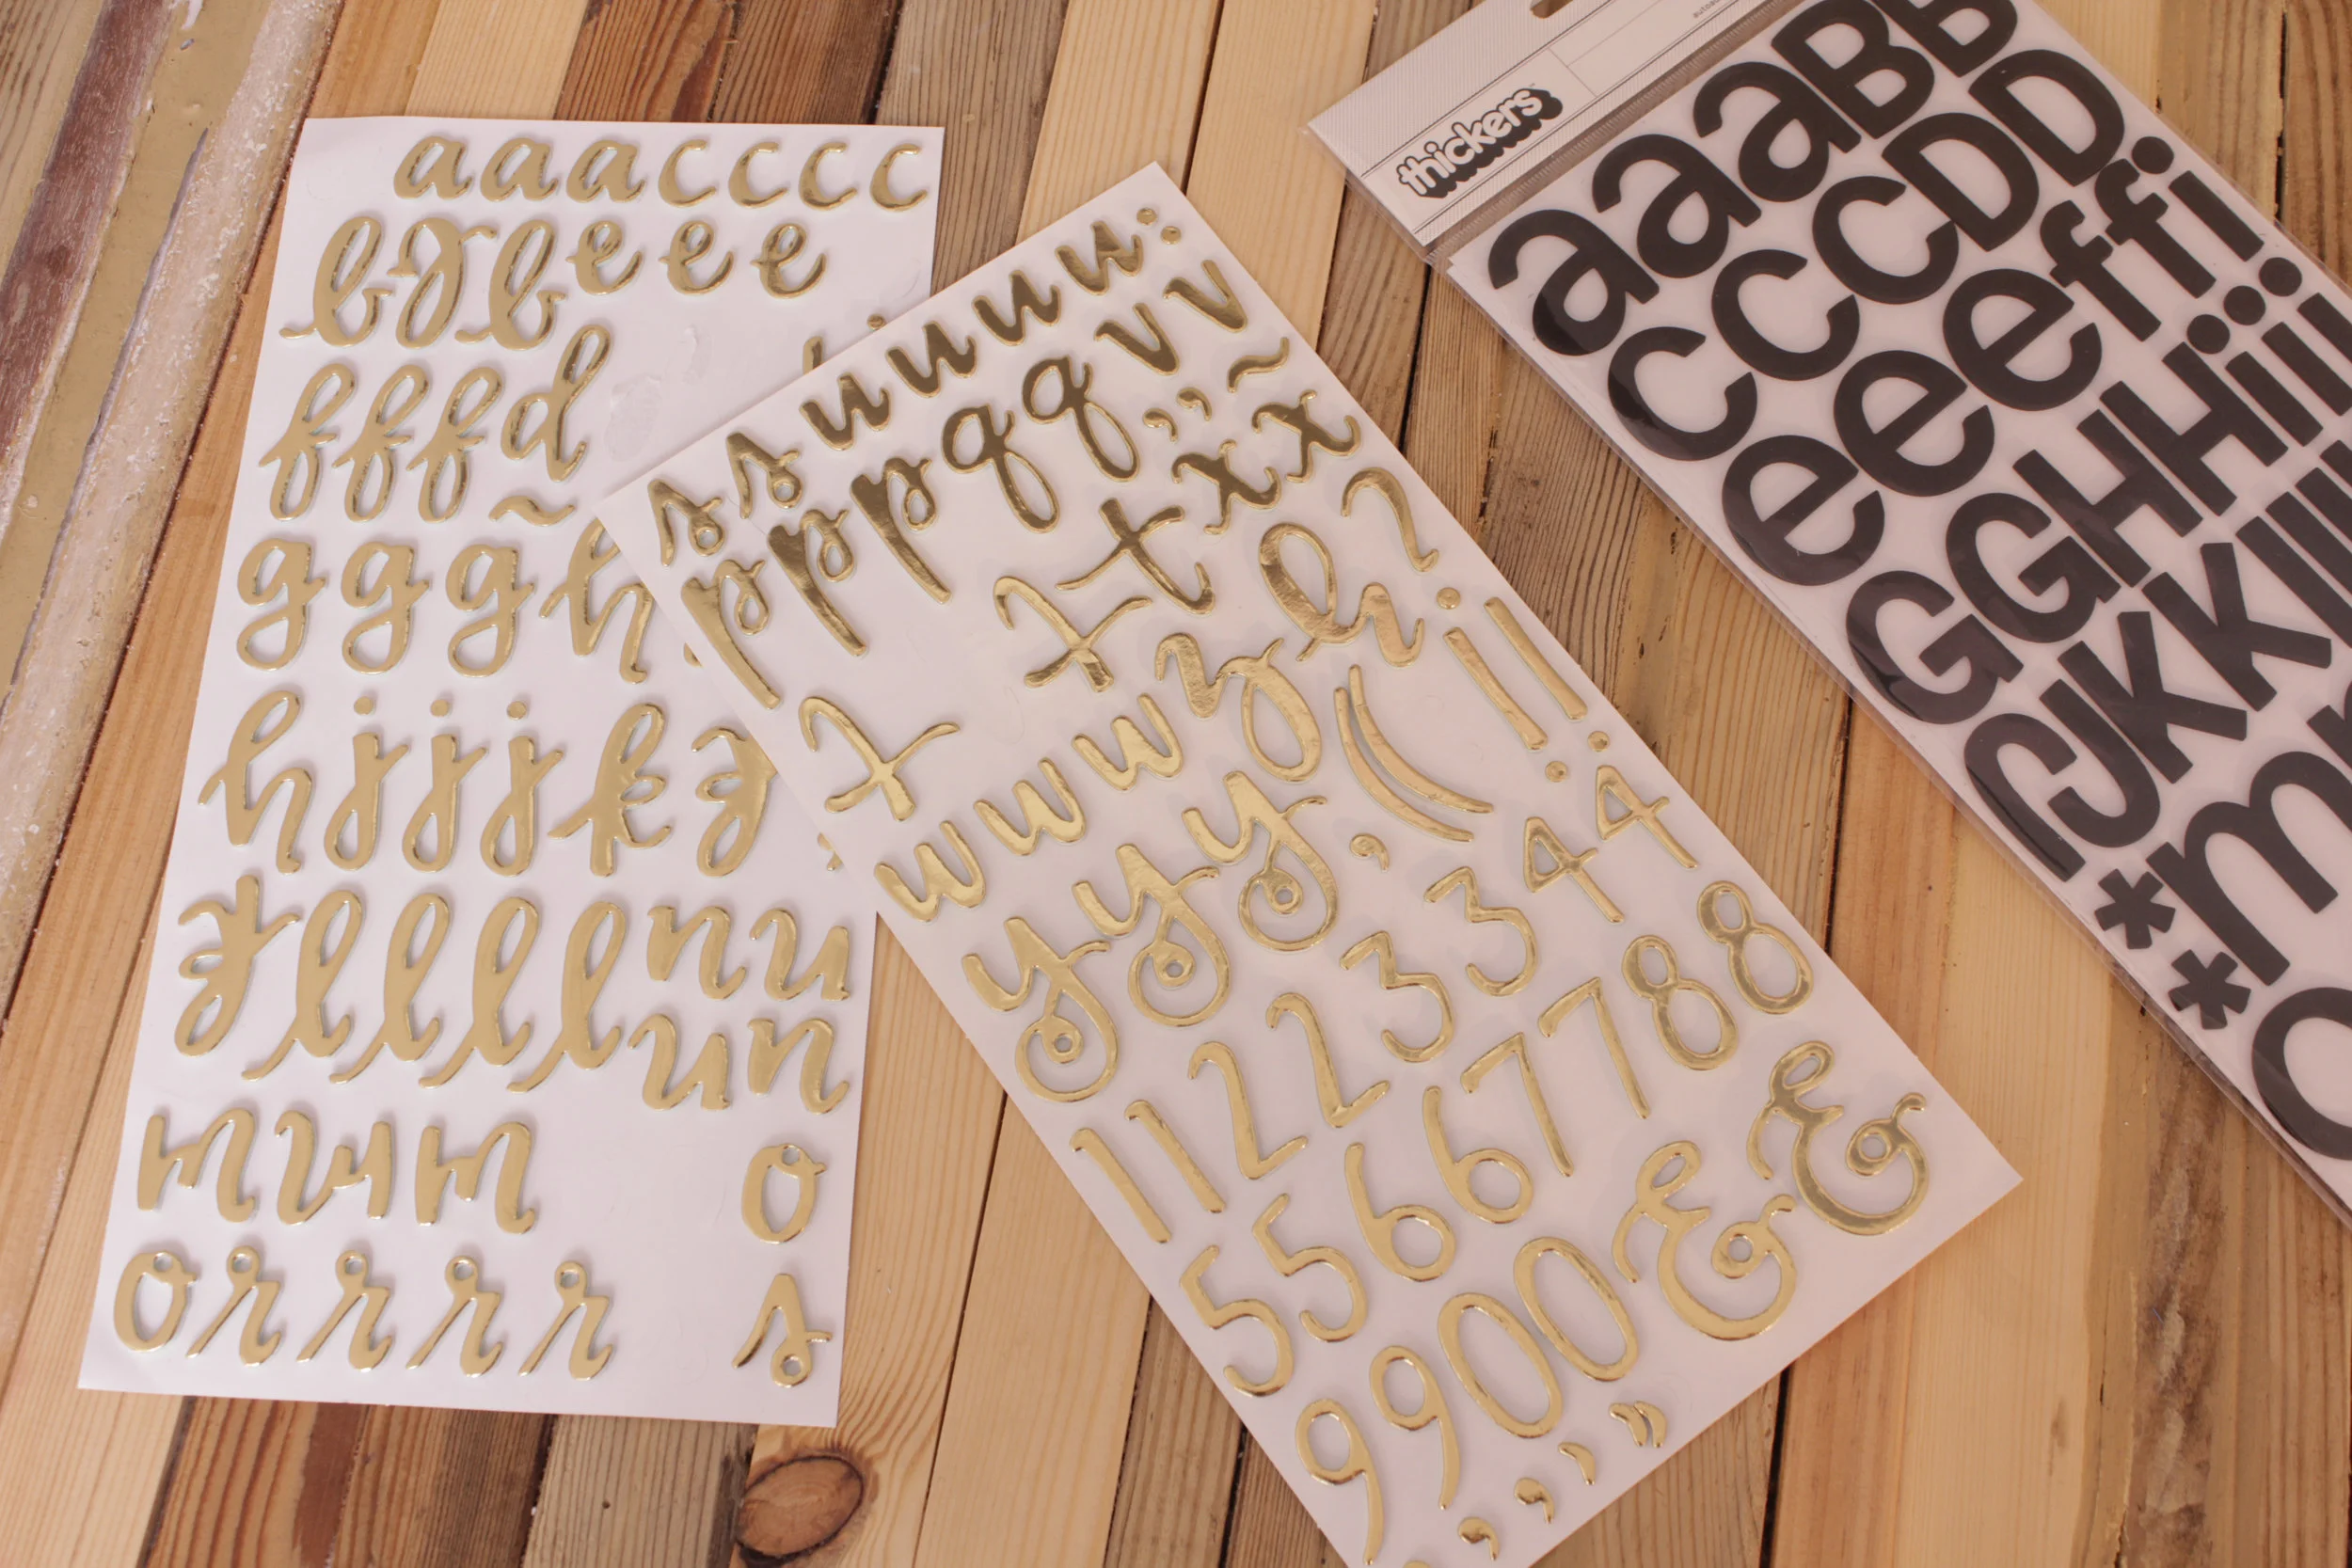
When all the hexagons are painted and dry its time to add some words. I wanted to add 'To do' and 'inspiration' . You can hand paint this on the wall but it is way neater, and easier to use nice stickers instead. I got these raised golden letters from my local craft shop, stick them on wherever you want.
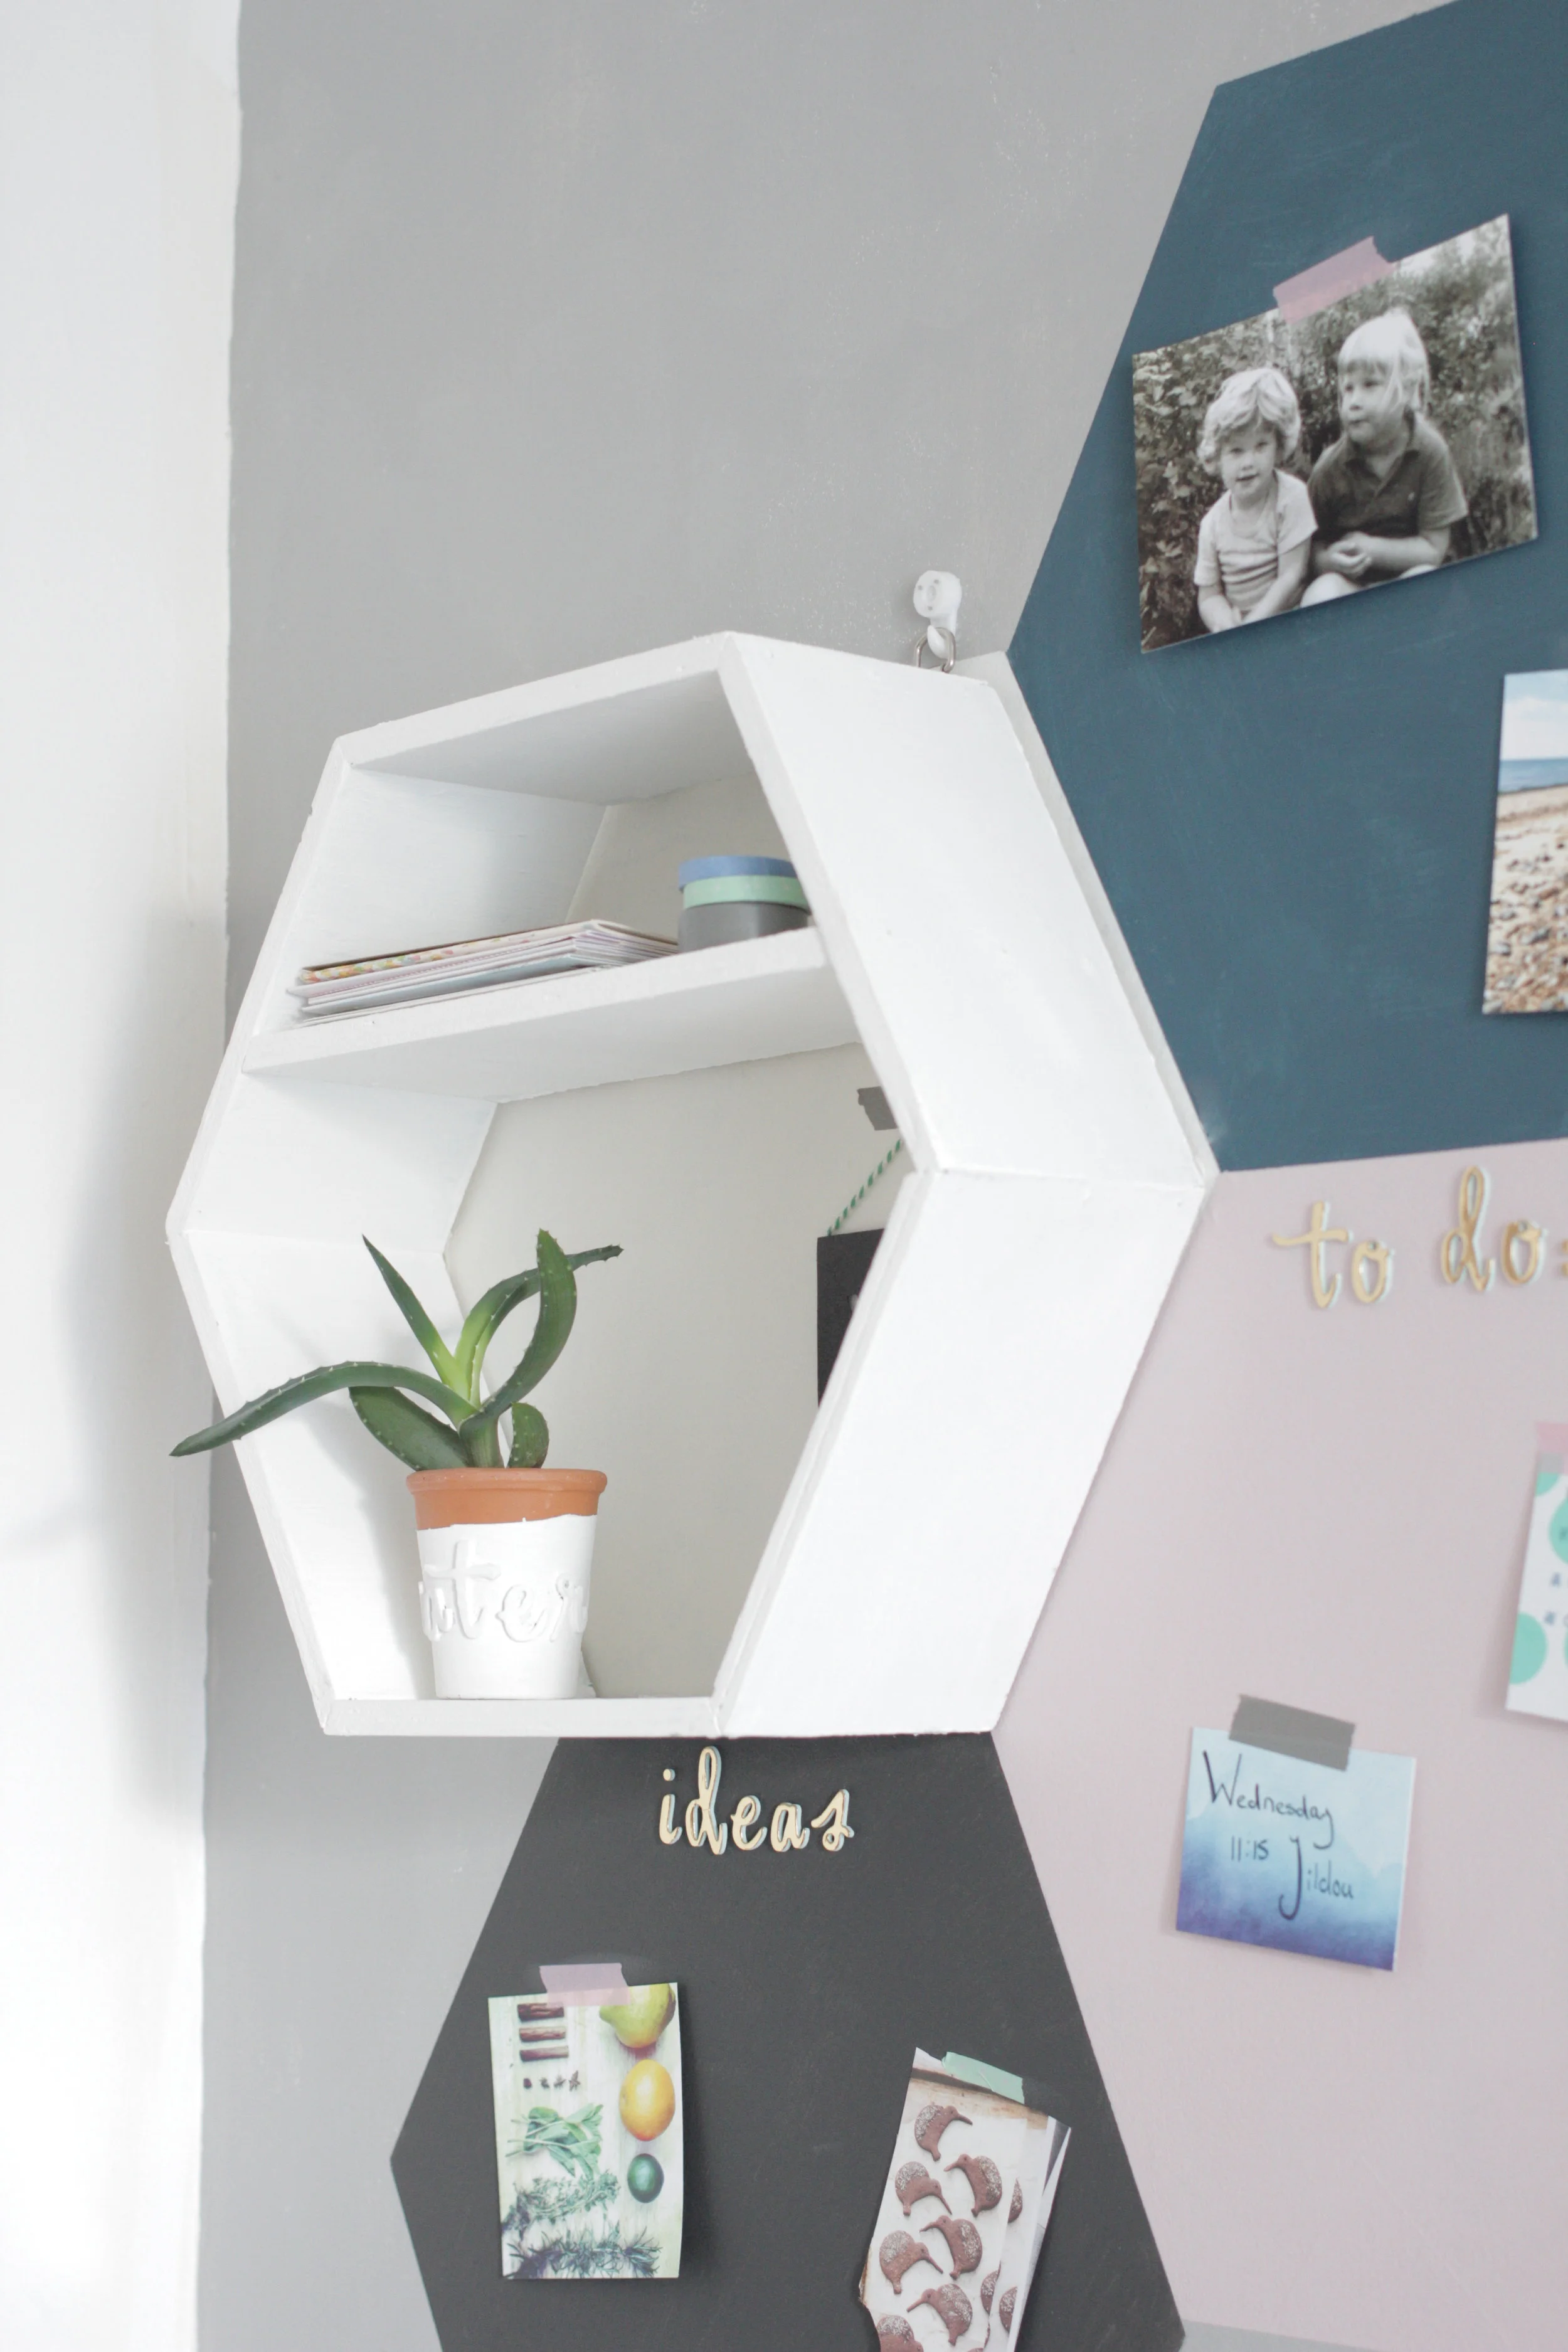
The hexagons on their own look great on the wall but for some extra oomph I placed a wooden hexagon shelf on top of the white wall hexagon. I had build this one for a previous project and they are not to hard to make. Have a look online if you don’t want to make your own, otherwise scroll down to see how I made mine.
To make the hexagon shelve
Step 1: Cut your plywood in 6 pieces of 20cm x 15 cm, you need to saw the ends on a 60 degree angle to make a hexagon. The easiest way is to use a mitre saw, if you don’t have one ask somebody that has or go to a wood workshop it will safe you a lot of work. To do it by hand use a protractor to mark of a 60 degree corner.
Step 2: Paint the planks, I used Annie Sloan chalk paint® in pure. Let the paint dry and apply a second coat if needed.
Step 3: On the top of each plank pre-drill 3 holes 1 cm from the top. Drill them on an angle, this will make getting the nails in straight a lot easier, only drill 3 holes per plank.
Step 4: Take a plank and apply wood glue to one side. Press against another plank and hold the joint together with two pieces of masking tape. Keep repeating until you completed your hexagon. You can add more tape diagonally to make it easier to handle your shelf.
Step 5: Hammer in nails into the pre-drilled holes. The glue will keep your hexagon together but the nails add a little bit more sturdiness.
Step 6: Screw in two D-ring to the top plank 2cm from the side.
Step 7: To make the extra cross shelve measure the width of your hexagon. The plank will also have to have the ends cut to 60 degrees and paint the cross shelve.
Step 8: Add some wood glue to the sides and push your shelf in place, you want this to be as snug as possible. You might need to use a hammer to force it in place. Don’t hit the shelf itself, you will see hammer marks, protect the wood with an off cut. If by accident your shelf doesn’t fit tight hammer in some nails to keep it in place.
This painted wall organiser is a project as Painter in residence for Annie Sloan, find my other projects and the materials I used on Annie's website www.anniesloan.com/about-annie-sloan/painters-in-residence

